CodeMorphis
Joined: 02 Dec 2003
Posts: 252
|
 Posted: Sun Aug 29, 2004 1:47 pm Post subject: Programming Tip #11: Creating Functions Posted: Sun Aug 29, 2004 1:47 pm Post subject: Programming Tip #11: Creating Functions |
 |
|
Programming Tip #11: Creating Functions
In this article, we take a look at how to create functions. A function is a portion of computer code that we can reuse over and over again, but we can use different data for each call to the function.
Let's take a look at what a function is and how to create one. Later we'll discuss the merits of using functions.
Below we have a very simple program that just adds two numbers and then opens a message window displaying the result of the addition.
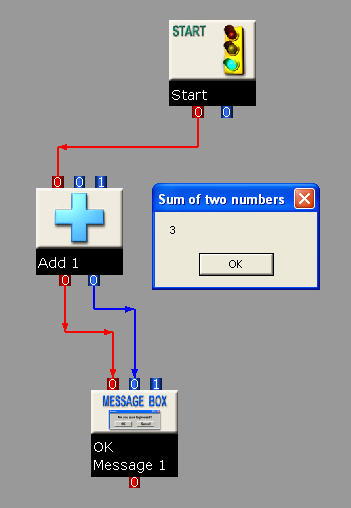
To set the values that are added, right click the Add component and select the "Input Argument(s)" option. In the dialog that opens set the values desired:
Let's suppose that we will want to reuse the portion of code defined by the Add and MessageBox components so that we can add any two numbers and display the answer.
First let's multiselect the two components. To do this, use the mouse to drag a selection rectangle around the two components.
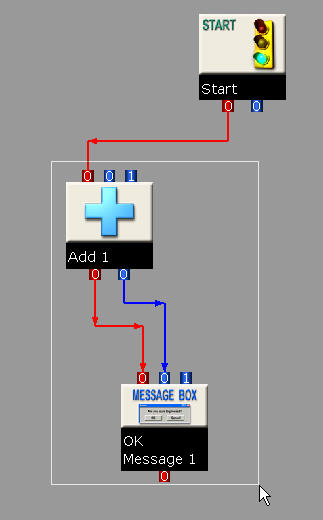
Then in the Synopsis toolbar, click Component | Nest Component(s). This will cause the two components to be nested inside a Nesting component. Double click the Nesting component to descend a nesting level and go inside the Nesting component.
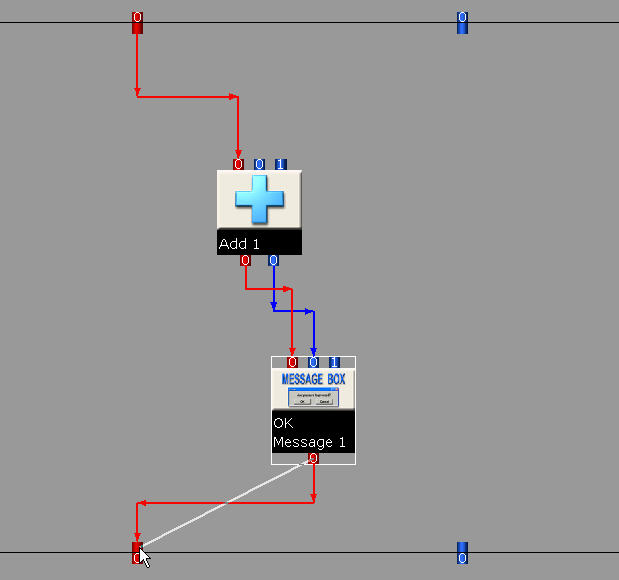
Connect the red output process port of the MessageBox component to the output process port on the interior of the Nesting component. This allows for process control to continue from the Nesting component to whatever component may be connected to the Nesting component later on.
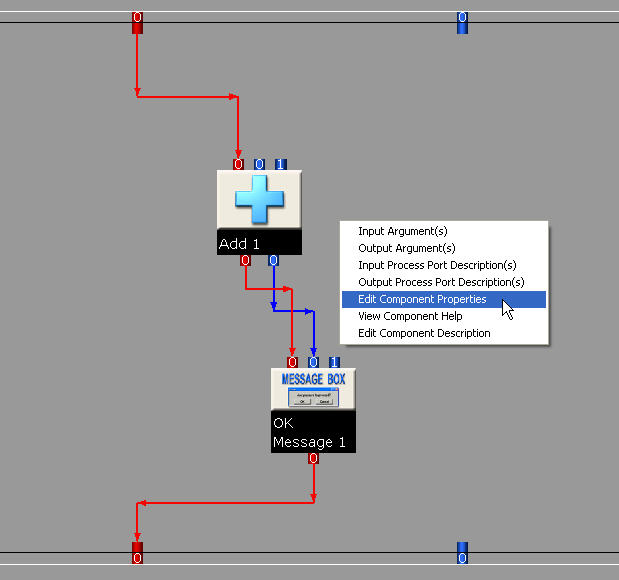
Now, right click on an area inside the Nesting component to bring up the component's context menu and select "Edit Component Properties".
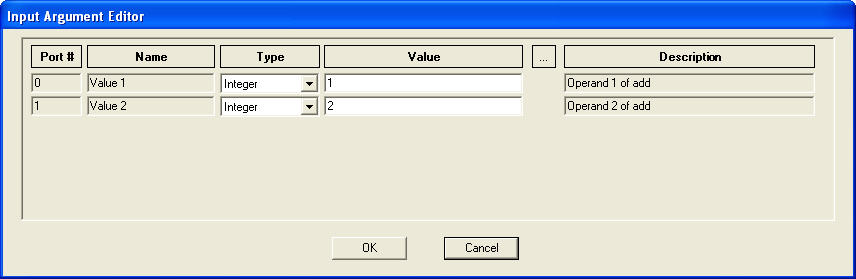
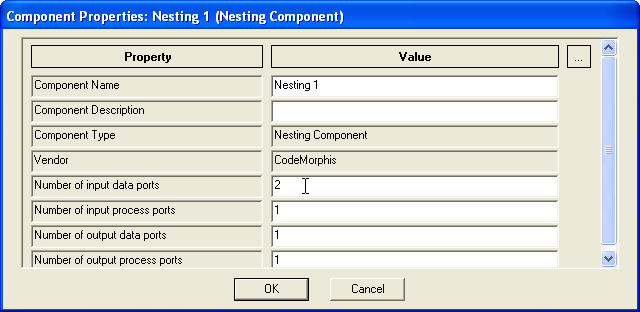
In the dialog seen below, change the value of the "Number of input data ports" property to 2.
When you click OK, we see the results of the change:
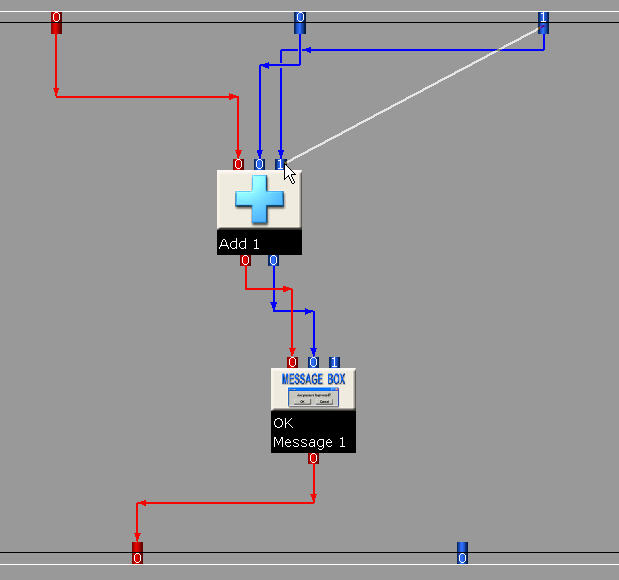
Note that there are now two blue data input ports instead of just one. We will use these two input data ports to allow for two arguments to be supplied for the add operation. Connect the two blue data input ports on the interior of the Nesting component to the two input ports on the Add component as shown.
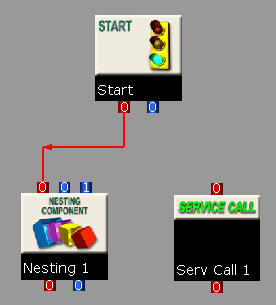
Now click on the "Dec" button in the Synopsis toolbar to exit the Nesting component. Drag and drop a Service Call component from the Program tab of the Component Tray. Our program now looks like this:
Double click the Service Call component to edit its properties.
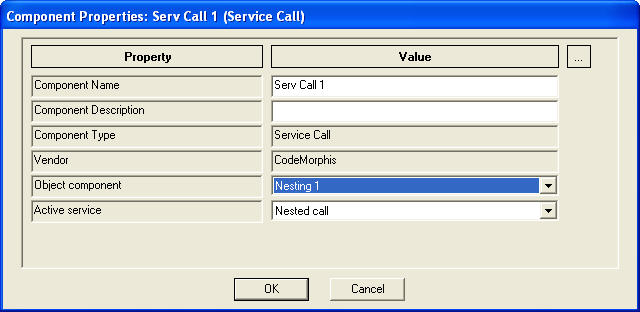
Select the Nesting component in the "Object component" property. The "Active service" property gets set automatically to the "Nested call" service. If the referenced component offers more than one service then we would be able to select a different service. Since a Nesting component only allows us to invoke it as a function, there is only one choice. Click the OK button in the "Component Properties" dialog to accept the property changes.
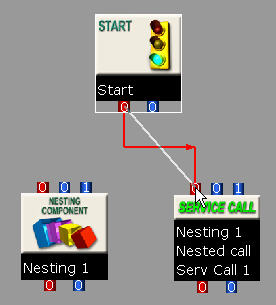
Connect the red output process port on the Start component to the input process port on the Service Call component. Note that the Service Call component indicates that it is referencing the "Nesting 1" component and that it is accessing the "Nested call" service of the Nesting component. These are the properties that we edited above.
Now we want to set the values for our function call. Right click the Service Call component and select "Input Argument(s)".

In the editor that appears set the types for the two arguments to be "Integer" instead of "String". This means that we want to use number values instead of string type values. In the value boxes, you can specify whatever numbers you like.
Now if you run the program you will see that the message box that appears contains the sum of whatever values you inputted.
Now select the Service Call component, press Ctrl-C and then Ctrl-V to copy and paste a new Service Call component. Edit the values for the second Service Call component as you did for the first, making sure to set the value types to "Integer". Connect the new Service Call component as below:
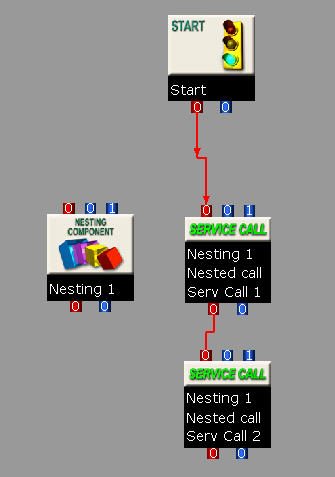
Now we see that if we run the program we get two message boxes, each with a different sum message. We have reused the code contained by the Nesting component.
Now go back into the Nesting component and add a Subtract component from the Component Tray. Make the blue and red port connections as below.
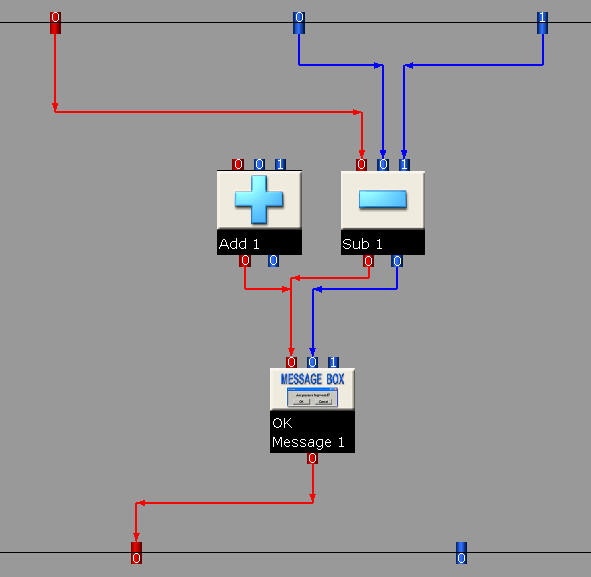
Note that we deleted the blue connections entering and leaving the Add component for the purpose of clarity but that you don't have to delete them.
Now if you run the program you will see that the message produced gives the differences and not the sums of the numbers supplied. We changed the behaviour of the Nesting component and reaped the benefits instantly for both Service Call components. Had we not used this function technique then we would have had to make more than one change to our code - a change for each time that we added numbers.
Here is the source file for the program:
http://www.codemorphis.com/articles/tip11/Function_call.vpd
There are many good reasons to use functions in programming. Some main reasons are:
- Functions make it possible to reuse code without having to duplicate code everywhere in your program. This reduces complexity and helps to keep things neat and organized.
- If you make a change to the function then all of the Service Calls that reference the function immediately access the new behaviour of the function. If you don't use a function then you would have to duplicate the function's behaviour throughout the code and everytime you need to edit the functionality code, you would have to do it several times in the program.
|
|
