CodeMorphis
Joined: 02 Dec 2003
Posts: 252
|
 Posted: Thu Aug 26, 2004 6:24 pm Post subject: Programming Tip #10: Grabbing the Screen Posted: Thu Aug 26, 2004 6:24 pm Post subject: Programming Tip #10: Grabbing the Screen |
 |
|
Programming Tip #10: Grabbing the Screen
In this article we will show how to do an image grab of the screen. You will be able to print preview the screen grab, print it and also save it to an image file for later use.
Here is the Synopsis source VPD file that we will be discussing:
http://www.codemorphis.com/articles/tip10/Screen_grab.vpd
If you open this file in Synopsis you will see the following program layout in the workspace area:
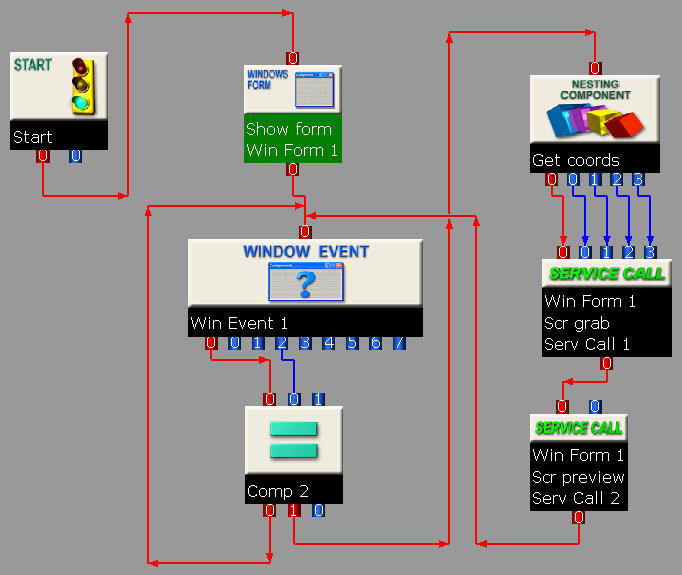
To learn how to get these components from the Synopsis Component Tray and how to construct the red and blue linkages, consult the Synopsis Help module and the previous forum articles (in particular http://www.codemorphis.com/forums/viewtopic.php?t=19 for usage of the Service Call component).
If you run the program you will see the following window:
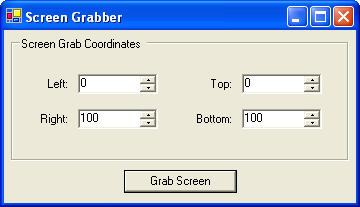
The user interface controls allow the user to select the four sides of the rectangle to be screen grabbed. When the user clicks on the "Grab Screen" button these four values are used to capture the contents of the screen within these bounds. The values are in screen coordinates that go from 0 to the maximum resolution of the screen. If for example, your screen resolution is 1024x768 then the valid value ranges are [0, 1023] for left and right and [0, 767] for top and bottom.
Try running the program and after selecting some values in the numeric up/down input boxes, click the "Grab Screen" button. This will cause control to be passed to the "Get coords" Nesting component.
Let's double click the "Get coords" Nesting component to descend a level and see what it is doing.
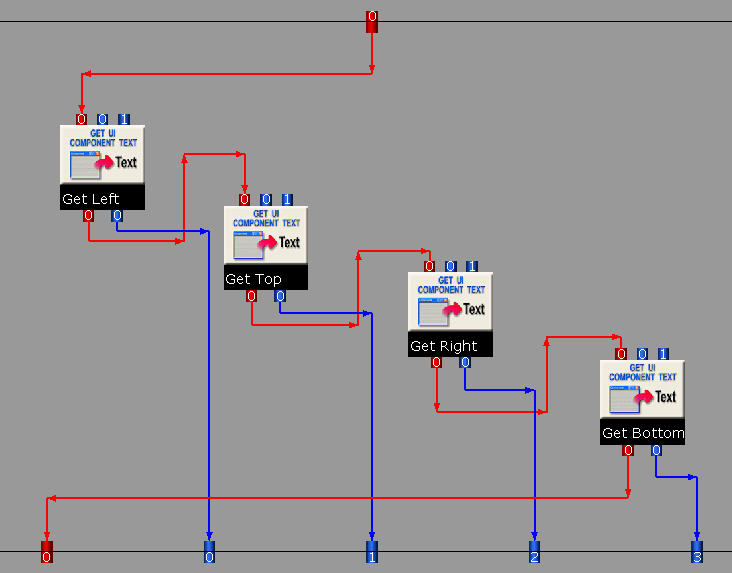
We see four nested components, each one a "Get UI Component Text" component. Each of these components retrieves the user input values from the Left, Top, Right and Bottom numeric fields in the program window.
Right clicking one of these components we can access the "Input Argument(s)" to see the arguments:
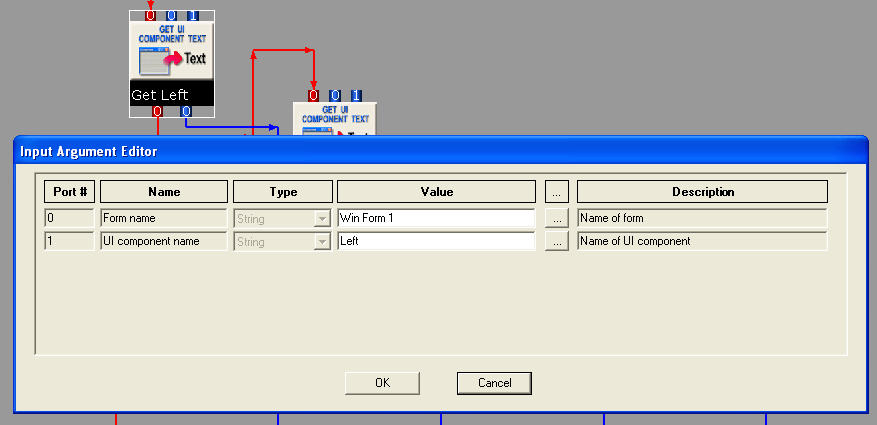
Here we see the name of our Windows Form (Win Form 1) and the name of the user interface component (Left) - these two values tell the "Get UI Component Text" component which value to retrieve. The arguments for the other nested components are similarly assigned.
Let's click the "Dec" button in the Synopsis toolbar above to return to the main program level (represented by the first image in this article). We see that there are four blue data connections running from the "Get coords" Nesting component into the Service Call component called "Serv Call 1". This Service Call component is connected to the Windows Form object component (see http://www.codemorphis.com/forums/viewtopic.php?t=19 for an explanation of this) and is accessing its "Scr grab" service. This will grab the screen with the given coordinates.
The next component to be executed is the "Serv Call 2" component which also connects to the Windows Form component but this time accesses the "Scr preview" service. This service causes a preview window to open, displaying the grabbed portion of the screen.
If you double click on the "Serv Call 2" component, you can change the value of the "Active service" property to "Scr print". Now if you click on the "Grab Screen" button the screen grab will be printed. Selecting the "Scr save" service would cause the screen grab to be saved to a file. When using the "Scr save" service, you must supply the name and path of a target image file to which the screen grab will be saved. To do this, right click the "Serv Call 2" component (after selecting the "Scr save" service) and click "Input Argument(s)":
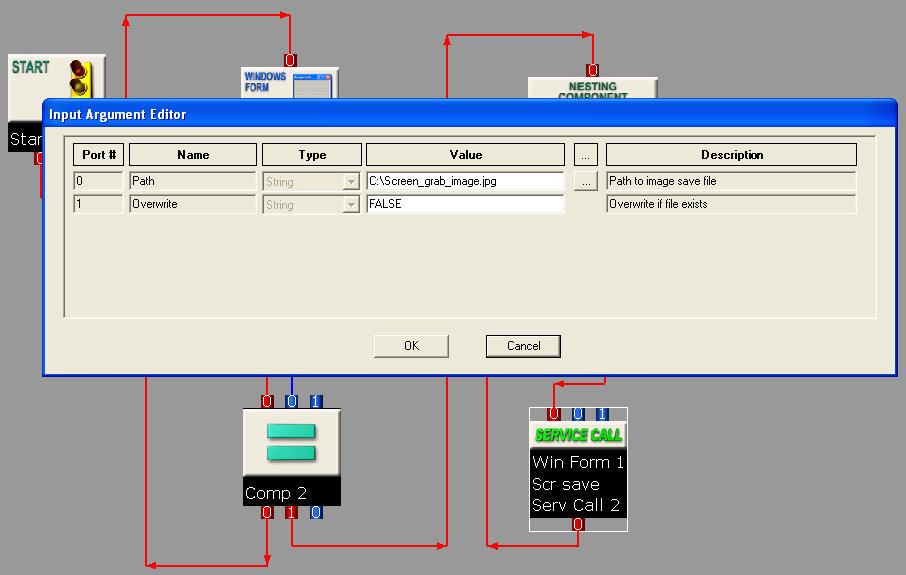
Here we see that we have specified an image file name "C:\Screen_grab_image.jpg". The extension that you supply determines the image file type generated. You can save to .jpg, .gif, .tif, .bmp, etc. |
|
