CodeMorphis
Joined: 02 Dec 2003
Posts: 252
|
 Posted: Thu May 19, 2005 4:39 pm Post subject: Posted: Thu May 19, 2005 4:39 pm Post subject: |
 |
|
You can use the Nesting component in either way: either creating your visual code and then selecting it for nesting, or creating a Nesting component first and then adding visual code to it.
Here is how to first create the Nesting component and then add logic to it.
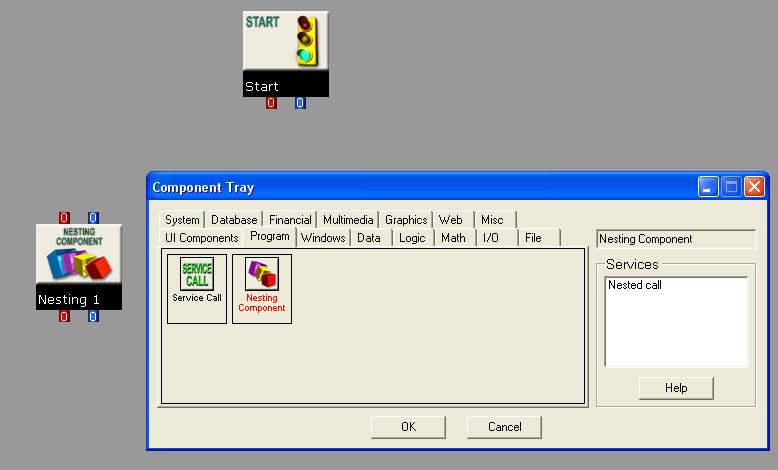
First open the Component Tray and select the Program tab. Then drag and drop the Nesting component onto the workspace area:
Now we can double click on the Nesting component to descend a nesting level and add logic to it.
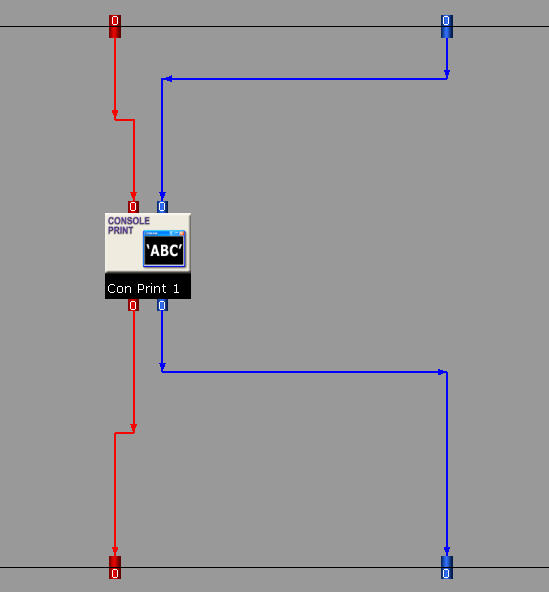
Here we have added a “Console Print” component which can be found in the “I/O” tab of the Component Tray.
You can now connect components inside the Nesting component to its internal interface. The internal interface are those ports that appear inside the black rectangle that delimits the boundary of the Nesting component.
The error message that you noted: "Cannot connect a nested component to the external port interface of its nesting component” occurs when you try to connect nested components to the external ports. The external ports are used to connect components outside the Nesting component. See the article http://www.codemorphis.com/forums/viewtopic.php?t=14 for an explanation of the internal and external interfaces of Nesting components.
Double click on an area inside the black border of the Nesting component that is not occupied by a nested component. This takes us out of the Nesting component and ascends one Nesting level. We can also click on the “Dec” button in the Synopsis toolbar to decrement the nesting level. When we do this, we once again see the Nesting component that we have created:
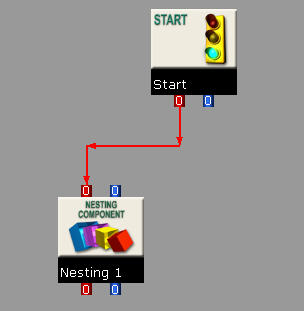
Note that we do not see the nested component(s) at this level (i.e. Nesting level 0). This is because the nested components are contained by the Nesting component. We can connect the Start component’s output process port to the Nesting component to complete a very simple program that outputs the Nesting component’s argument to the console output area.
To specify an argument for output, double click on the Nesting component’s blue input data port (the blue port at the top of the Nesting component). This brings up the Input Argument Editor and allows us to specify something to be output. In our program, we have added some text like “hello!”. When we run the program, the text is output to the console output area.
You can download this program here:
http://www.codemorphis.com/articles/ans_051905/nesting_prog.vpd
Hope that this helps. Please feel free to ask more questions if you require help.
For further reading on the Nesting component, see http://www.codemorphis.com/forums/viewtopic.php?t=25 |
|
